Photoshop Tutorials Pinned
453 replies · 142020 views
hey guys sorry to bother but i was just wondering if u guys could help me really quick i have Adobe Photoshop CS 8 and how do u use the background eraser i mean i erase it but how do i put in ontop of another pic like example i erease i pic of a model and i want the backgruoun to be a becaech how u do that please help me
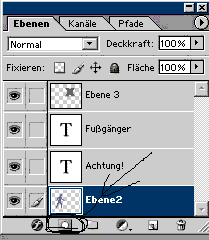
You have to work with the level or layer. Don`t know how it calls. Sry on this pc I don`t have PS. But you must erase with "transparensy", then to insert the background you want to have. But your pic that you "erase" must be the top layer. Normal is this "layer-panal" in the right corner. Here a pic

To erase you take this tool and then you work with the brush (black/white).
thanx for the help but i still dont get it im so confused im sorry im wanna try to under stand it your way
Today I`ll be at home, so I can make some nice pics  and try to show you step by step
thax so much that would help a lot thanx a lot acro again
I have a prob, one more day  sry.
sry.
Ok, here my tutorial Hope it`s good. At first we open a new project (I have the German version, so I don`t know the names in english, look at the pics )

Then you see on the right corner a new layer.

Open now the background image and the pic you want to erase. Then drag and drop them in the new project.

Now the pics don`t fit to the screen (wall size), so you push Strg (think in english it`s Ctrl) + T. But at first you have to activate the layer you want to resize. Then you push the Shift-Button and hold it until you are finished the resize and click and hold the mouse-button on a corner of the pic and move it then.
Ok know the size an positions are you, we can start with the work 
The layer with the pic you want to erase must be always on top
Choose this, then push the button in the pic (don`t know the name) then a second "window" will be create on the layer. Click on this to activate it.

Then take the brush-tool 
With black you erase

and with white you un-erase it

That`s it. Work always with layers and be sure you have the layer activated with you want to work. For example if you want to colore something, then create a new layer and color then the thing, then you never will "destroy" the original pic.
When I`m working on a pic then I press F then F again and then Tab, then you have only the pic Play with F, Tab and Shift + Tab. With Ctrl + + and Ctrl + - you can zoom.
Hope I could help you and sry for the english and mistakes.
thanx so much acro im wanna go try it right now your so awsome and your english is good too
i did it thanx so much
but how do u save it as a pic jpeg imaige becaus eit only saves on photoshop like u can only see it there
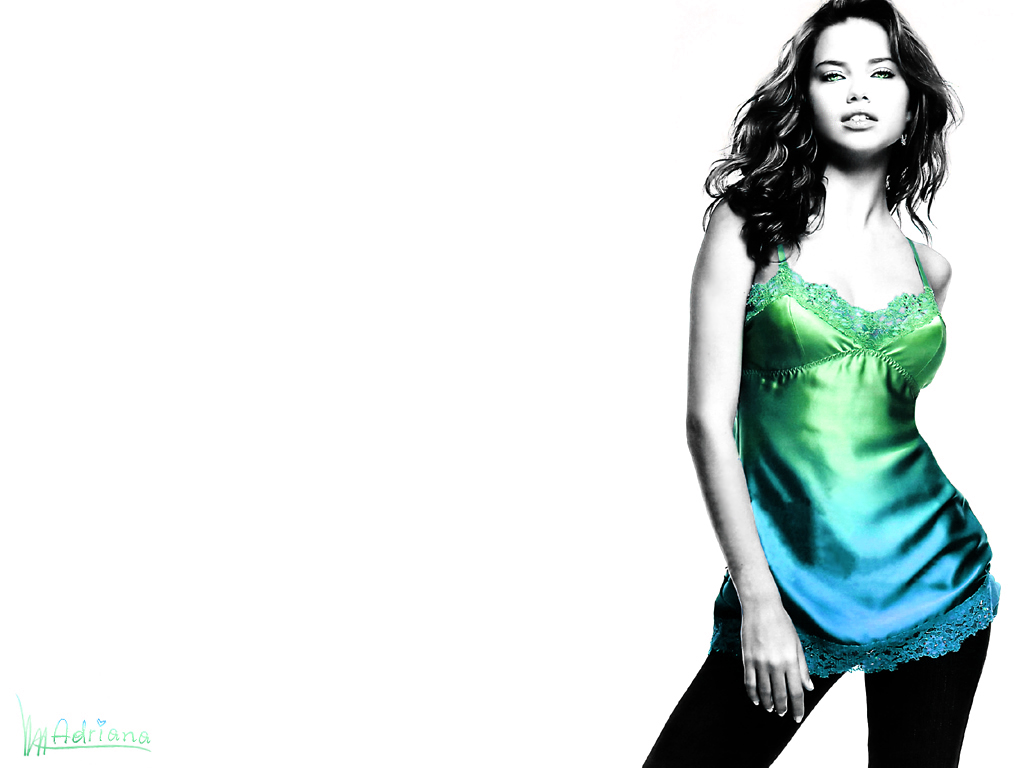
Maybe this pic will help you 
it worked thanx so much
sorry to bug again but do u guys know how to create this two affects it would help a lot thanx


The second one is a lot like what Acro described, they just took a bunch of images, erased parts of them and lowered the opacity on the layers the images were on.
As for the first one, I'll throw together a quick tutorial for you since I don't know how to explain it. I use PS 7 though, just in warning. So if Acro can do it or someone else with CS, then that might be easier for you to understand.
First, open your image and duplicate the layer twice. (To duplicate, go to LAYERS > DUPLICATE or hit CTRL+ALT+SHIFT+N, unless they've changed the quick keys).
So your layers pallette will now look like this:

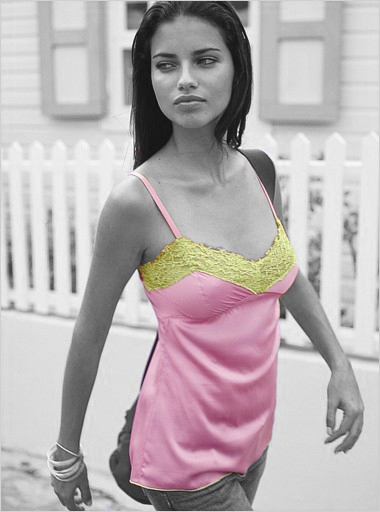
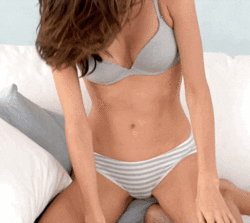
Next, desaturate the 'copy 1' layer by going to Image > Adjustments > Desaturate (CTRL > SHIFT > U). Select the 'copy 2' layer, and select your eraser tool (E) and erase EVERYTHING but her shirt using small brushes for near her body.
You end up with something like this:
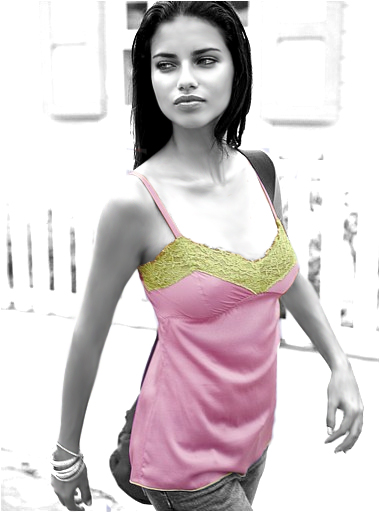
After you're finished erasing the 'copy 2' layer, select the 'copy 1' layer and go up to ADJUSTMENTS again. Select "Brightness and Contrast" and slide both little arrows up to 40. Then select the smudge tool at 10% opacity (to get the 'smooth plastic' look to her skin) and slowly blend the skin on her face, arms, etc, avoiding places like her eyes and lips. At the end of all that, you get this:
Next, set the 'copy 2' layer (the one that we erased everything but the shirt on) and set the layer to HARD LIGHT.

If you want to make the shirt a little darker, create a layer between the b&w layer and the shirt layer and paint the area beneath her top with black and duplicate the layer you set to HARD LIGHT and up the contrast to 40.

Here's what the layer pallette looks like:

Maybe this pic will help you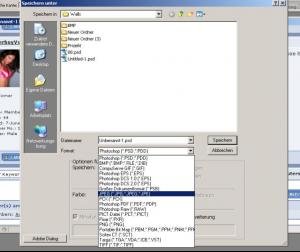

That doesnt compress it.
Ctrl + Shift + Alt + S for Save For Web and you can select the quality and other nice little stuff.
thanx a lot
thanx a lot avadakedavra and maddog107 it worked but do u know how to do the other one 
thanx
He already answered "the other one"
Quote
"The second one is a lot like what Acro described, they just took a bunch of images, erased parts of them and lowered the opacity on the layers the images were on."
how do u lower the opacity
how do u lower the opacity<{POST_SNAPBACK}>
take a look at that....you see at the top next to hard light it says opacity